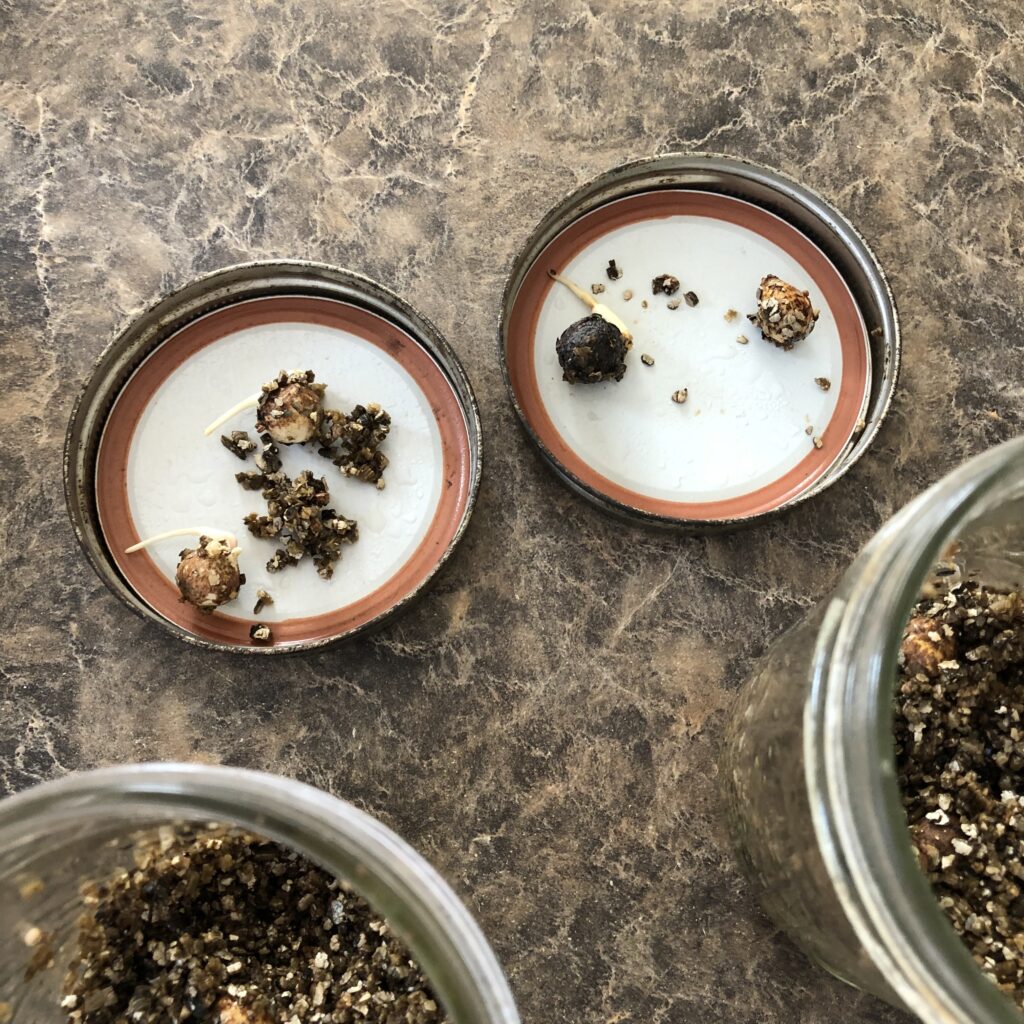
This is an attempt to outline how I have managed to get quandong seeds to germinate, based on a lot of trial and error.
I’ll attempt to describe loosely what we’re aiming to do and then explain step by step what I do, so you can adapt the process to suit your needs.
What are we trying to do
Germinating quandongs is relatively straight forward. An emu eats a quandong and poops out the seed and at some point it germinates. Germinating them at home and without waiting so long is tricky.
You want good quality seed that isn’t too old and has been correctly stored. To remove this variable I would recommend buying seed from a trusted source in the first instance until you’ve got the process working and then moving to gathering seed from the environment once you’re confident. I buy from nindethana and have always had good viability but your preferred seed supplier will likely be perfectly fine.
You want to remove the shell without crushing the nut inside. This will speed germination considerably (45 days instead of 3-6 months). You can achieve this by cracking with a hammer or a pair of vice-grips (see earlier post).
There is a little paper-y material covering the shell. Removing it seems to reduce the risk of mould, so remove it.
You need to keep the seed damp and in a warm-ish, dark environment until it germinates. This will crate the perfect environment for mould. Mould will kill your seeds before they can germinate.
To reduce the risk of mould we use vermiculite as the germination medium. I’ve tried coir and chamomile tea and both get very mouldy very quickly. Vermiculite, being a mineral, is somewhat resistant to mould and at the very least if it does develop it doesn’t spread as rapidly to the other seeds. Vermiculite was the game changer for me and I recommend it.
There is lots of literature advising you soak the seeds in bleach or an anti fungal agent to reduce the risk of mould. I haven’t had much luck with this so I can’t say. I have found that seeds soaked in filtered water didn’t seem to have a noticeably increased risk of mould compared to those soaked in a 10% solution of household bleach, but my science may be lacking.
The seeds need air to germinate, so you can’t just seal them in a vacuum to reduce the mould risk.
The container you use matters. I’ve had luck with mason jars that have been sterilised in the microwave and brand new resealable bags as containers for the seeds and vermiculite.
We have to wait about 45 days, checking on the seeds once weekly and removing any that have fallen prey to mould. I use a set of plastic chop sticks that I dunk into a cup of boiling water after touching each mouldy seed and removing it. You could use a teaspoon I just like chop sticks.
The seeds will develop a bulge at one end and then a root will appear. At this stage you can remove it from the vermiculite and pot it out into a large (30cm wide) pot. They will want a big pot and they don’t like their roots being mucked with, so just start them in a big pot. I cover the seed with about 5cm of soil and some mulch.
Once you’ve potted them out you still have a few weeks before they poke their head out from below the ground. Be patient – and sometimes they never poke their head out. It happens.
Once they’ve been in a pot for about 8-12 months you can plant them out.
Yes they are semi parasitic but not early on – you can add a grass or other companion plant after they have started to put on true leaves.

What I do
- Crack the seeds by whacking them iwith a metal hammer. I sit on the cement to do it. It’s relaxing. You will notice there’s a little line on the seed which seems to be the weak point – orient this like vertically (one end facing the ground, the other the sky) and the seed seems to crack more smoothly.
- Soak the seeds in water.
- Take a few pint sized mason jars and microwave them for 1 minute to sanitise
- Set the jar up on a kitchen scale. Add 20g of vermiculite to the jar. Add 80g of boiled water from the kettle. Mix to combine.
- Allow it all to cool down – leave the seeds in water while you do this, say an hour.
- Drain the seeds from the water and dig them into the vermiculite. They can be on the surface but they seem to like being partially submerged.
- Add the lid to the jar and place in a cupboard.
- Wait. Germination will be faster if it’s warmer so be mindful of that, but each week inspect the jars. Remove any seeds that are mouldy. Keep checking.
- After about 6-7 weeks you should see success.
- Pot out into a 30cm pot under about 5cm of soil and wait again for the quandong friend to poke it’s head out.
- Now you have a quandong friend ❤️